Contrast
I’ve always had a hate/hate relationship with the “contrast” slider – no matter which software. It would always clip the shadows, or worse, create negative values if used on floating point data (less of an issue in Photoshop but easily observable in Fusion). It looked ugly and I’ve spent a lot of redoing other people’s grading nodes because the color values were broken all over the place.
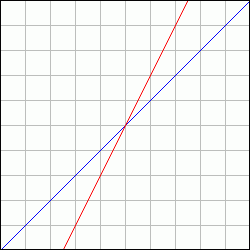
If you don’t know it already, here’s what the contrast slider usually does:

contrast as found in most image editing software
If you color-correct in sRGB (yuck) the slider really does change the picture’s contrast. But like I said, it clips shadow details pretty quickly. Which translates to “instantaneous” in linear (non-gamma-corrected) space where color values are tiny. The better way to increase contrast was an S-shaped curve tool (recently, Photoshop has finally improved its contrast algorithm and labeled the formula it used before as “legacy”).
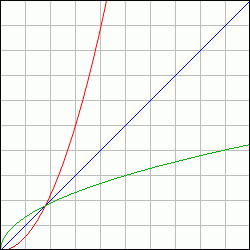
Nuke also has a contrast slider in its color correction node. First I avoided it like the plague until I tried it on a test gradient to figure out what it does. Lo and behold, it’s actually usable since its formula has been re-invented for linear floating point pipelines. It is actually a gamma correction but instead of “pivoting” around a value of 1.0 it is anchored on 0.18 – neutral gray in linear space:

contrast as implemented in Nuke (on a scale from 0.0 to 1.0)
The formula is easy to implement: pow(color / 0.18, contrast_value) * 0.18
Of course it needs a failsafe when contrast_value is zero, but this is obviously a constant value of 0.18.
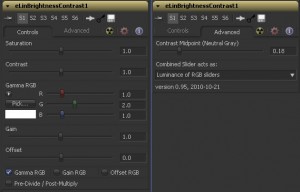
I have built this formula into a Fuse for Fusion along with Nuke’s other color correction sliders. This makes the tool useful to copy color corrections made in a Nuke script to Fusion. It could have been a macro, but the Fuse API allowed me to play around with the GUI and make Nuke users feel even more at home – myself included.
Download and more info at Vfxpedia.
