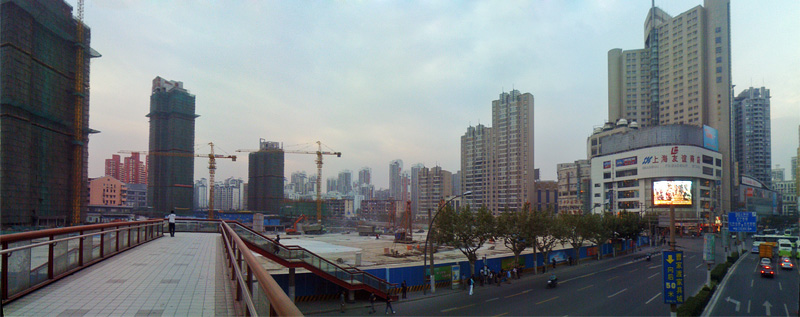
iPhone Panorama Stitching
All photos on my travel blog have been shot with a 1st generation iPhone. The picture quality at the original resolution of 1600×1200 is lousy. However, if you scale them down to something tiny like 640×480 it’s actually alright for my purpose: posting them on a blog or sending them by email.
![]() I wondered how difficult it would be to stitch panoramas from those grainy, blurry iPhone photos and those images in my previous post are the result. I used the free open-source toolset Hugin. It’s 0.8 version for Windows is a bit difficult to find, and you need at least that version for the photometric white balance compensation, so here’s a link to a pre-compiled EXE installer.
I wondered how difficult it would be to stitch panoramas from those grainy, blurry iPhone photos and those images in my previous post are the result. I used the free open-source toolset Hugin. It’s 0.8 version for Windows is a bit difficult to find, and you need at least that version for the photometric white balance compensation, so here’s a link to a pre-compiled EXE installer.
I’m amazed at how mature the imaging algorithms are, or that those algorithms exist in the first place (and I’m working with digital images on a daily basis :-)). Hugin not only managed to undistort and blend the images perfectly, it also removed the camera’s vignetting and compensated for the difference in exposure. This is an important bit because the iPhone adjusts its shutter speed automatically which is usually a bad thing for panoramas.
The only thing I had to do (apart from clicking two buttons) was entering the camera’s focal length. It’s not included in the EXIF data which is a bit of a disappointment. Maybe Apple wanted to hide it from other smartphone manufacturers? Well, google turns up the required data pretty quickly. The iPhone (2G) has a film-equivalent focal length of 37mm or a field of view of about 50 degrees.
Of course the final panorama doesn’t allow for severe color corrections. The colors are dull (it was an overcast day as well) but you could play around a bit more to create a more vibrant result. Anyway, it’s good enough for me to snap some more in the future for my Shanghai reports. Stay tuned!
